Sticky rice mango cheesecake: Creamy coconut no bake torte
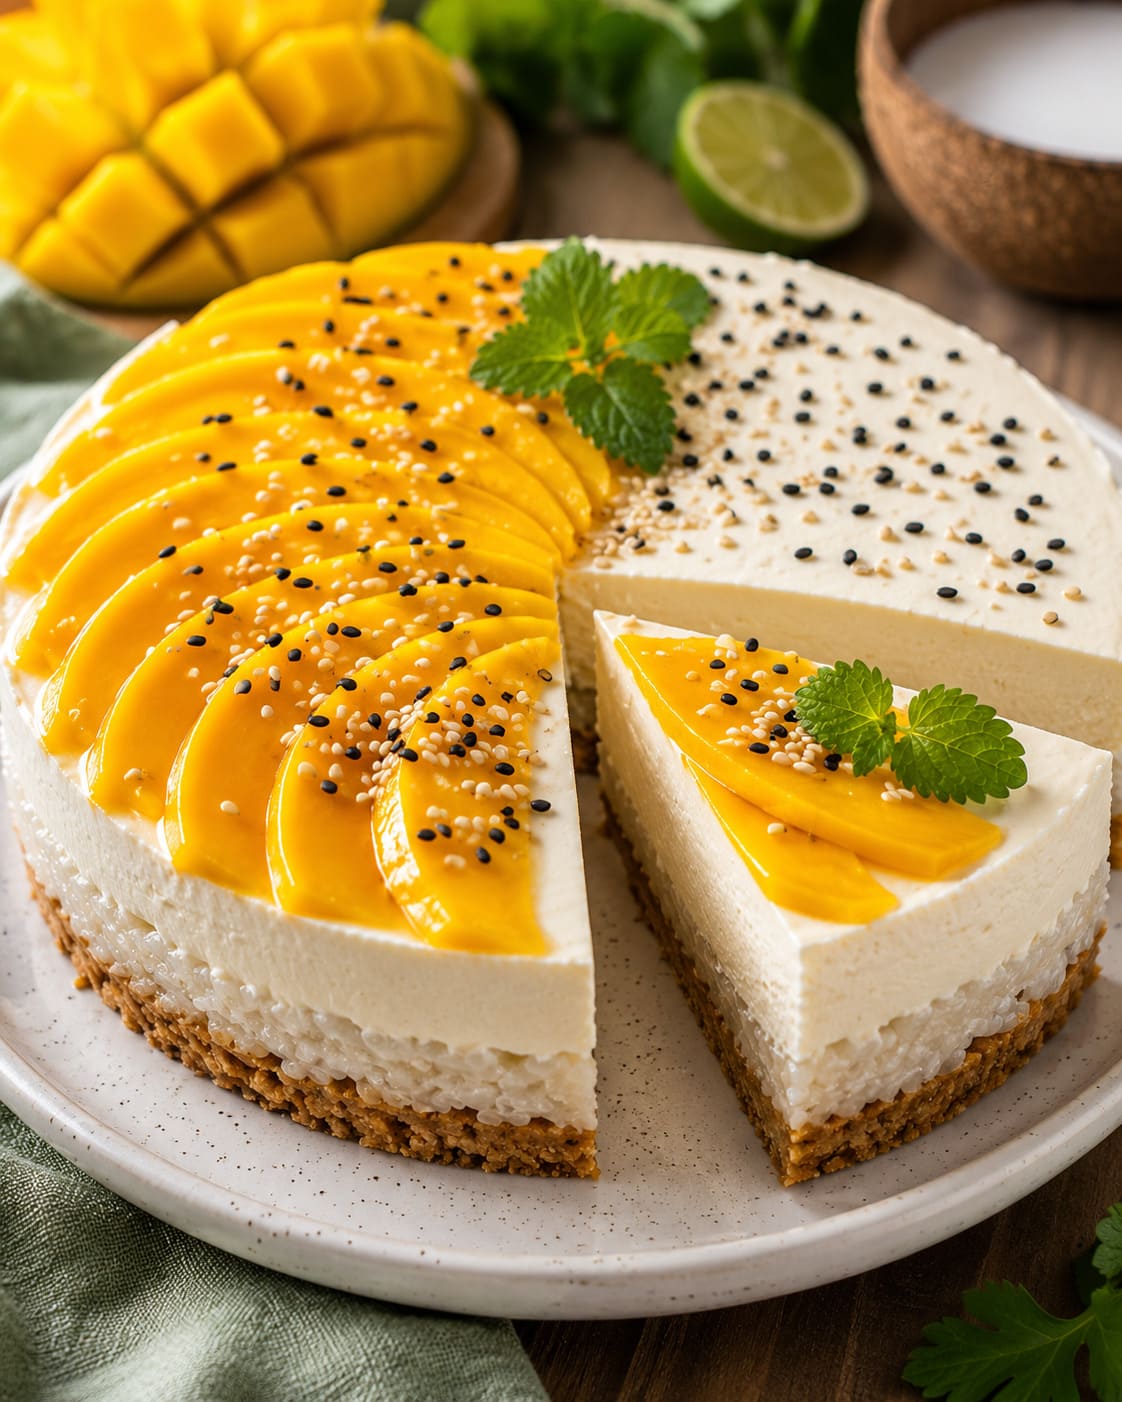
Pressing a rich biscuit crunch layer into a springform pan and topping the base with a sweet, coconut-infused grains matrix builds an absolute masterpiece of modern Asian fusion confectionery. Today we are mastering a premium, high-contrast summer dessert milestone from our creative sweet collection: classic homemade Sticky Rice Mango Cheesecake. This eye-catching no-bake recipe combines a traditional sweet rice layer with a velvety lime cream cheese foundation, bringing the refreshing tropical flavours of a beachfront holiday directly to your dinner table.
The culinary secret to this streamlined blueprint relies on precise hot liquid grain absorption and separate late-stage dairy cream aeration mechanics. Instead of dealing with heavy raw components or baking the filling under hot oven vaults, we are fully hydrating our dry glutinous rice inside a sweet sugared coconut milk cauldron first to build a solid structural mattress. Covered under a velvety cushion of whipped lime cream and a beautiful fanned tile pattern of fresh yellow fruit slices right before serving, every single slice delivers an incredible balance of unctuous creaminess and clean orchard contrast.
what you need
for the sweet coconut sticky rice layer
- 100 g traditional dry glutinous sticky rice grains
- 130 ml rich creamy liquid coconut milk
- 2 tbsp white granulated sugar
- 1 heavy pinch fine sea salt
for the crispy sweet biscuit baseline
- 60 g sweet cream butter
- 100 g traditional dry whole wheat butter biscuits
for the velvet lime cream cheese mattress
- 150 g heavy liquid whipping cream
- 1 packet commercial whip stabilizer powder
- 300 g traditional rich high-fat cream cheese (warmed to room temperature)
- 40 g premium powdered sugar
- 0.5 whole fresh organic bio lime (strictly to capture the raw rind and sour juice lake)
for the tropical fruit harvest and layout crown
- 0.5 whole fresh ripe sweet mango
- 1 tbsp dry white sesame seeds
- 1 tbsp dry black sesame seeds
- 6 leaves fresh organic sweet lemon balm or mint
- As needed fresh parchment paper sheets strictly to line the round springform pan bottom base
step-by-step
Let us begin with the critical hot liquid grain hydration ritual to establish our sweet sticky baseline filling foundation. Wash your 100 grams of dry glutinous sticky rice grains thoroughly inside a fine sieve under a cold running tap stream, transferring the washed rice into a bowl filled with cold water to steep quiet and soak for a patient minimum of 1 full hour. Drain the soaking water lake pool completely, rinsing the rice once more before tumbling the grains inside a small copper saucepan vessel along with 100 milliliters of fresh water. Bring the liquid to a roaring boil over high flame lines, then immediately turn the burner heat dials completely off; snap a tight-fitting lid enclosure secure over the pan rim boundaries, letting the rice rise quiet and swell for exactly 10 minutes total until all the water is fully absorbed.
Meanwhile, in a separate small pot, combine 130 milliliters of rich creamy coconut milk, 2 tablespoons of white granulated sugar, and 1 heavy pinch of fine sea salt, warming the fluid lake over a steady medium flame line until the sugar crystals fully dissolve. Pour this sweet hot coconut milk directly down inside the warm rice saucepan pot, turning the lines slow with a spoon until uniform; snap the lid back secure, letting the rice mixture swell and absorb the cream for 10 final minutes before setting the pan aside on your counter workspace to cool down flat to room temperature.
Now, handle your crispy biscuit base crushing and assembly sequence. Melt 60 grams of sweet cream butter blocks inside a tiny saucepan over a steady slow flame line for 60 seconds until liquid. Place your 100 grams of dry whole wheat butter biscuits inside a separate plastic storage bag container, using a heavy rolling pin tool or your bare fingers to finely crush, shatter, and crunch the cookies into fine uniform sandy gravel crumbs. Tumble the buttery cookie gravel directly down into a round 20-centimeter wide metal springform baking pan bottom base meticulously lined with a sheet of parchment paper, using the flat base of a small glass cup tool to firmly press and compact the mass into a tight solid baseline shield. Spread your cooled coconut sticky rice mattress proudly and uniformly right over the cookie layer floor shield, smoothing the grains flat before sliding the pan inside your fridge lines to rest cold for exactly 30 minutes total.
Execute your velvet lime cream cheese aeration and whipping sequence right alongside the chilling clock. In a clean deep mixing container beaker, combine 150 grams of cold heavy liquid whipping cream, raining in 1 packet of whip stabilizer powder while whipping the dairy fluid rapidly with a machine on high speed for exactly 3 minutes until stiff white snow peaks build on the floor, then slide separate inside the fridge. Wash your half portion of a fresh bio lime under hot water, using a fine microplane grater tool to friction-shave the green rind into transparent zest strands before squeezing out the sour juice lake. In a separate massive mixing bowl container, combine your 300 grams of room temperature cream cheese, 40 grams of premium powdered sugar, all your lime zest strands, and the lime juice lake. Whisk the heavy dairy lines rapidly with the wire loops of a hand mixer machine on medium speed for exactly 2 continuous minutes until an absolutely smooth cream mirror builds on the floor, then use a rubber spatula to slowly turn and fold your cold whipped cream clouds straight inside the cheese cauldron until a uniform fluffy cream mattress builds.
Pluck your cold rice pan out from the fridge boundaries frame. Scrape your velvet lime cream cheese mattress proudly right over the sticky rice layer, using an offset spatula to smooth the surface perfectly flat. Slide the loaded baking pan straight into your fridge frost lines to sleep quiet and chill secure for a patient minimum of 4 full hours total or overnight until the dairy lipids fully stabilize and lock the torte layers solid.
Chef’s Critical Mango Fanning Secret: Do not attempt to peel your fruit unevenly or slice the mango flesh into thick clumsy chunks! Peel your half portion of a fresh ripe sweet mango with a sharp utility knife blade, cutting the orange fruit flesh cleanly away from the tough central stone block in a single massive sheet. Place the fruit flat across a wooden chopping board canvas workspace, using your sharpest utility blade to slice the tender fruit flesh lengthwise into thin uniform vertical strip bands. Arrange 4 to 5 mango strips fanned out closely overlapping each other in fanned groups side by side flat right over exactly one half section of your cold cheesecake ceiling boundaries frame, leaving the remaining white cream roof shield naked to build a gorgeous asymmetric visual look.
Time for the final presentation layout masterclass. Pluck your rock-hard chilled cheesecake proudly out from the frost boundaries frame right at the final finish line. Slide a sharp utility knife blade carefully along the inner margins of your round baking form to release the cream boundaries cleanly, lifting the metal rim away before sliding the cake wheel onto a white ceramic presentation plate canvas workspace floor layout. Garnish the summits meticulously by nesting your fresh green lemon balm leaves decorative right beside the fruit summits, showering a final colorful rain of your 1 tablespoon of white sesame seeds and 1 tablespoon of black sesame seeds heavily across the boundaries frame to secure that signature high-end bakery contrast look. Slice cleanly into 16 massive identical uniform slice wedges using a sharp warm blade, serve cold, and enjoy your tropical paradise!