Dragon fruit cheesecake bites: Pink marbled no bake squares
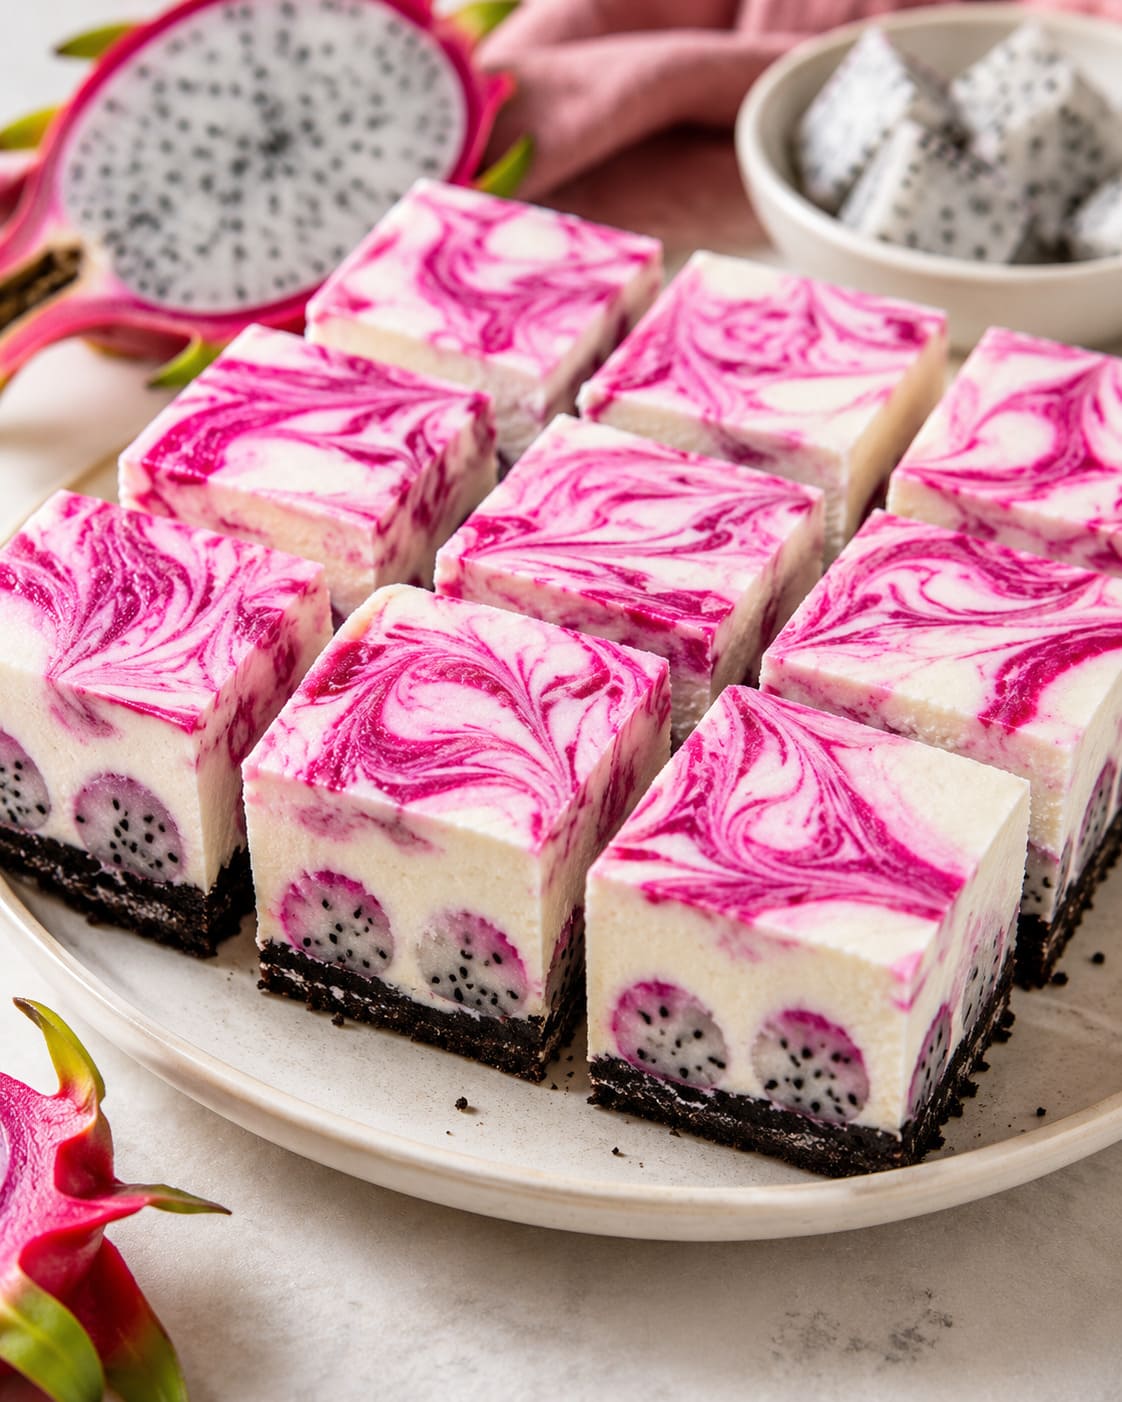
Pressing a rich, chocolate cookie crumb base into a square pan and layering the crust beneath a velvety cream cheese matrix builds a magnificent modern confectionery masterpiece. Today we are mastering an absolute blockbuster summer milestone from our dessert collection: classic homemade Dragon Fruit Cheesecake Bites. This eye-catching no-bake recipe features a beautiful pink swirl cream foundation hidden with juicy fruit spheres, delivering an incredibly satisfying texture profile that outshines standard flat sheet cakes or basic grocery box shortcut puddings.
The culinary secret to this streamlined blueprint relies on rapid cold cookie crushing and separate late-stage structural gelatin stabilizing dynamics. Instead of baking a delicate cheese filling under high oven vaults—which could split the fat networks—we are setting our smooth low-fat curd and cream cheese mixture inside a chilled fridge enclosure to preserve an exceptionally cloud-soft texture block. Covered under a vibrant marble pattern of neon-pink fruit powder cream right before slicing, every single square delivers an incredible balance of velvety richness and tropical seed crunch contrast.
what you need
for the crispy chocolate cookie base
- 100 g sweet cream butter
- 225 g traditional rich dark chocolate chip cookies
for the velvet dragon fruit cheese mattress
- 2 whole fresh ripe dragon fruits (about 300 g each)
- 6 sheets premium clear unflavored gelatin
- 200 g heavy liquid whipping cream
- 500 g smooth low-fat unsalted curd cheese (warmed to room temperature)
- 300 g traditional rich high-fat cream cheese (warmed to room temperature)
- 100 g white granulated sugar
- 3 tbsp fresh tangy lemon juice
- 1 packet traditional aromatic vanilla sugar
- 2-3 tsp premium freeze-dried dragon fruit powder
- As needed fresh parchment paper sheets strictly to line the square springform pan bottom base
step-by-step
Let us begin with the critical chocolate cookie crumbling ritual to establish our textured baseline crunch foundation canvas workspace. Melt 100 grams of sweet cream butter blocks inside a small copper saucepan vessel over a steady low flame line for 60 seconds until liquid, then remove from the active heat. Place your 225 grams of dark chocolate chip cookies inside a separate plastic storage bag container, using a heavy rolling pin tool or your bare fingers to finely crush, shatter, and crunch the biscuits into fine uniform sandy gravel crumbs. Tumble the buttery cookie gravel directly down into a square 24-centimeter springform baking pan bottom base meticulously lined with a sheet of parchment paper, using the flat base of a small glass cup tool to firmly press and compact the mass into a tight solid baseline shield before sliding the pan inside your fridge lines to rest cold for exactly 30 minutes total.
Now, handle your tropical fruit ball portioning sequence right alongside the chilling clock. Take your 2 whole fresh ripe dragon fruits, using a sharp utility knife blade to cleanly cut the thick pink skins lengthwise into halves. Grab a miniature melon baller or cookie scoop tool, plunging it deep inside the white dotted flesh chambers to cleanly loosen and scoop out multiple neat fruit spheres; continue the loop to collect all the available flesh blocks while saving any residual fruit skin scraps separate. Pluck your cold cookie base tray out from the fridge boundaries frame, distributing your fresh dragon fruit spheres proudly and evenly flat all across the bottom base floor shield before sliding the pan back into the chill lines.
Execute your velvet cream cheese stabilizing and whipping sequence. Plunge your 6 sheets of premium clear unflavored gelatin straight down inside a deep cup filled with bone-cold fresh water, letting the sheets steep quiet to soften for 5 minutes. In a clean deep mixing container beaker, combine 200 grams of cold heavy liquid whipping cream, whipping the dairy fluid rapidly with a machine on high speed for exactly 3 minutes until stiff white snow peaks build on the floor, then slide separate inside the fridge. In a separate massive mixing bowl container, combine your 500 grams of room temperature low-fat curd cheese, 300 grams of rich cream cheese, 100 grams of white granulated sugar, 3 tablespoons of tangy lemon juice, and 1 packet of aromatic vanilla sugar. Whisk the heavy dairy lines rapidly with the wire loops of a hand mixer machine on medium speed for exactly 2 minutes until an absolutely smooth cream mirror builds on the floor.
Pluck your softened gelatin sheets out of the cold water lake pool, aggressively squeezing your fingers to discard any excess water drops before melting the jelly over slow heat inside a tiny pan for 30 seconds. Quickly whisk 3 tablespoons of your room temperature cheese cream directly down inside the warm gelatin cup first to adjust the temperature parameters block before scraping the entire fluid mix straight back inside the main cheese cream bowl container, mixing rapidly. Use a rubber spatula to slowly turn and fold your cold whipped cream clouds straight inside the cheese cauldron until a uniform fluffy cream mattress builds. Separate exactly 4 tablespoons of this white cream separate inside a small cup, stirring in 2 to 3 teaspoons of vibrant freeze-dried dragon fruit powder with a spoon until a uniform neon-pink cream mirror forms.
Chef’s Critical Marble Swirling Secret: Do not attempt to pour your fillings unevenly or let the pink streaks stand unblended over the surface canvas! Ladle all your remaining plain white cheese cream proudly right over the fresh dragon fruit spheres inside your baking pan, smoothing the surface flat with an offset spatula. Drop your prepared neon-pink cream mattress in multiple random dollop pools across the white ceiling boundaries frame; take a thin wooden skewer stick or dinner fork tool, drawing the needle through the creams in elegant circling loop motions to create a gorgeous marbled fuchsia-white contrast swirl pattern that looks like an artisan torte. Slide the loaded pan straight into your fridge frost lines to sleep quiet and chill secure for a patient minimum of 4 full hours total or overnight until the gelatinous grids lock solid.
Time for the final presentation layout masterclass. Pluck your rock-hard chilled cheesecake proudly out from the frost boundaries frame. Slide a warm wet knife blade carefully along the inner margins of your square baking form to release the cream boundaries cleanly, lifting the metal rim away before sliding the cake wheel onto a wooden presentation board canvas workspace canvas floor layout. Cut the square block cleanly into 16 massive identical uniform cube pieces measuring exactly 6 x 6 centimeters each using a sharp warm blade. Pile the luxurious sweet wheels proudly side by side across a clean white porcelain presentation plate, garnish with extra fresh dragon fruit skins, serve cold, and dive straight into pure paradise!